SITI NORSAKINAH BINTI AB.GHAFFAR
D20111047294
I want share how to model Blood ASP robot in 3Ds Max.
1. Image reference (blueprint)
2. Modeling a body
3. Texturing
1. Image reference (blueprint).
- First of all, I search the blueprint image robot on internet. The name of robot that I choose is Blood Asp.
- And then, I separate the views robot Blood Asp from the blueprint by using Adobe Photoshop.
- Open the image in Photoshop and by using 'Rectangular Marquee Tool', select the front view from the blueprint and press 'Ctrl + C' in the keyboard to copy the selection that I've made.
- Now, open a new document by press 'Ctrl + N' in the keyboard or do it by going to 'File > New' menu. When the New dialog box pops up enter the value of 240 pixels for width and 720 pixels for height, then click 'OK'. It all depends upon the size of the blueprint, as we may have to change the dimension for other blueprints. Make sure that it fits almost perfectly in the new document.
- Now just press 'Ctrl + V' to paste the front view into the new document and save it as an image file in hard disk.
- Do the same step for side view.
 |
| Front view |
 |
| Side view |
2. Modeling a body.
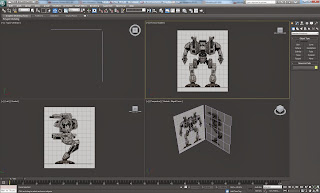
- After set up a blueprint, we must to build plane to enter the front view and side view.
 |
| Build a plane |
 |
| Blueprint set up |
- And then, click 'Shapes > Line' and trace that blueprint from front view and side view by using 'Line' tool.
- Start with trace part the leg from the body of robot.
- And then, click 'Modifier > Extrude' and adjust the number what amount that I want.
- Do the same step for the other part of body robot.
- But just doing for half of body the robot.
- For see through, we can press 'Alt + X'.
 |
| Alt+X |
- After finished make / do trace by using Line tool for the half body of the robot, check the amount that I use for all the part that I do.
3. Texturing.
- For the texture, open modifier by press M.
- And then I choose image for texture the model of robot.
- I choose 'Blinn' for my texture.
- After that, drag that texture into robot.
- Use the same step for other part of body the robot.
- To get more interesting, adjust spectacular highlights and then adjust the number of glossiness and specular level.
- After that, click 'Mirror' for the half body of robot.
Finally, render the robot.


No comments:
Post a Comment
Note: only a member of this blog may post a comment.