Planning stage:
- This fan is constructed 4 separated objects:
- Fan Base/Stand
- Motor
- Vanes
- Vane Cover
- These items can be constructed separated in a scene. Fan base should be built 1st, follow by the Motor, then the Vanes and ended by the Vane Cover.
- Identical progress of the model construction needs to be captured for elaborating purpose.
- Sketches of front and side view of a fan need to be placed in the viewing panel in order to create a more accurate model.

Front view sketch

Side view sketch
The Construction of Fan

Front view

Side view
2. The sketches were darkening by lowering the Color Gain setting for minimizing the contrast between the viewing panels and the sketches.

Fan Stand in Perspective View

Fan Stand in Side View
|

Creating Fan Motor

Completed Fan Motor
6. 2 cylinders were created for being the axle and the socket of vane cover.

Fan Axle and Vane Cover Socket were done.

Fan Vane creation and placement

Edited Duplicate Options Window

Duplicated Fan Vanes
9. A sphere was created to form the Vane Cover of the fan. 3 layers were created for the fan, to locate the parts of the fan. Then all of the parts except the vane cover were set as template.

Deforming a sphere to create the vane cover
3 Layers were created
10. The faces on the sphere were selected and extruded. Then the extruded surfaces were deleted to form the wired-frame like vanes cover.
Selecting sphere faces for extruding
11. Both sides of the sphere faces were extruded and deleted until the final look was formed.

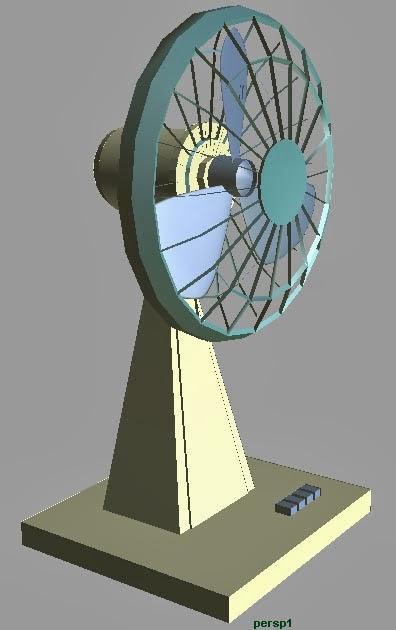
Completed Vanes Cover
- A cube was created and rescaled to form the button of the fan. Then it was duplicated into 3 more copies.

Fan Speed Controlling Buttons
- Next, 3 materials were created for the completed fan model.
- Then a directional light together with an ambient light were created.
- Once the Lighting setting was, the final output of a render image was created.
Materials on Fan

Rendered Fan Model
© Tan Wee Hoe 2001. All rights reserved.