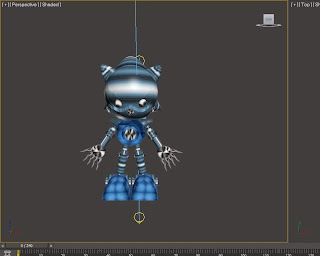
“Modeling a Robot tutorial”
Nabilah Binti Sihar
D20111047330
Modeling a Mechanical Model
Planning stage :
-Modeling a Head
-Modeling a Body
-Modeling Legs
-Texturing
Image References
The Process
1. Modeling a Head
a. Create a Sphere from Standard Primitive selection. This will be the model basic shape
for its head.
b. To do its eyes that has that kid of shape. right click on the selected object and then click on the Convert to: convert to editable poly.
c. To gives that shape click on the Cut and then follow the shape. After finish that, click on the Polygon select all the shape of the eyes and then Click on the Extrude and then move the tool to the back.
 |
| ears |
 |
| eyes |
 |
| front |
 |
| head all finish |
d. Then we add an eyes to the model by using sphere.
e. Next, the eyes will be duplicate/clone by right clicking on the object or by simply use CTRL+C and paste CTRL+V.
f. The other parts of its head such as nose and ears head part are also using standard
primitive object such as cone and cylinder.
g. The ears use the Convert to: convert to editable poly. and then make the shape like the ears.Same goes with the thing on the top of the head. The others parts of ears use the CTRL+C and paste CTRL+V.
2. Modeling a body
a. This part of body use basic shape of the cone. and then Click on the Convert to editable poly to change the shape.
b. This part of the hand.The shape at the top use the cone shape and then click on the Convert to editable poly to change the shape.
c. And then to make the part of the hand we use the Cone in the Standard Primitive selection.
d. To make the palm hand used the sphere and then click on the Convert to editable poly to change the shape. For the fingers use the cone in the Standard Primitive selection. And the at the Upper circle click on the inset and the extrude to make the fingers long. CTRL+C and paste CTRL+V.
e. To make another hands click Mirror..
3. Modeling a legs
a. At the above, the legs used the basic shape. Such as Cone.
b. At the bottom take the basic shape and then click on the Convert to editable poly to change the shape.
c. To make another legs. Click on the mirror.
4. Texturing.
a. Open Modifier (M).
b. Select Basic Shader Parameter, turn it to Metal, then at Metal Parameter
select Diffuse, pick a Bitmap.
c And adjust the Spectacular Highlights and change the number of the Level,and Glossiness.


No comments:
Post a Comment
Note: only a member of this blog may post a comment.