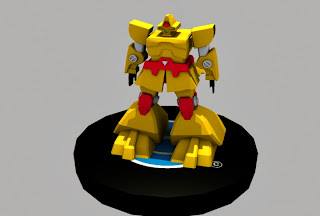
“ How to model Zaku ( Mechanical model) ”
Created by Ahmad Safwan Bin Abd Samad
D20111050111
Bachelor of Design (Animation)
Sultan Idris Education University
Modeling a Robot (Mechanical Model)
Planing a stage (step)
- Setup the blueprint
- Modeling a Head
- Modeling a Body
- Modeling a Legs, Arm and Hand
- Texturing ( color Material )
- Lighting and camera setup
- Rendering
Image References (blueprint)
Front
Side
Hand
Process model a Mechanical Robot.
1. Setting a blueprint
First before we start a modeling process, we must set up a blueprint as a reference. Before we start modeling in 3Ds max please check a resolution and size of image before setting.
Image Properties
Build a plane
The Blueprint set up
2. Modeling a Head
First I create line in front view and adjust it in modifier spine list and after that click in modifier box and select exclude modifier and convert to editable poly or edit poly and choose polygon and select inset and exclude it to make a robot face and final choose a edge in Editable poly and select front and back a robot head and select chamfer to make a polygonal head. For eye, Simply put basic cylinder on front a robot face.
3. Modeling a Body
The body and its components create same technique modeling a robot head and using a symmetry modifier
4. Modeling a Leg and Arm and Hand
For this part, the process same as a model a body. First create a line and once finished add exclude modifier and adjust the size and convert to editable poly.
finish zaku (robot) color arm model
see though zaku (robot) color arm model
wireframe zaku (robot) color arm model
zaku (robot) color leg model
see though zaku (robot) leg model
wireframe zaku (robot) leg model
5. Texturing (color material)
For texturing, I use a material editor or “m” for shortcut and used a basic color.
6. Lighting and camera setup
For this segment, lighting I used is a skylight and 1 spot light and using light tracer for lighting method.
7. Rendering
Finally, last step for modeling a zaku (robot) is a rendering process which it be output to a 3 type of renderer is a wireframe, grey and color .for this step go to render setup or F10.
wireframe render setup
zaku with color
zaku without color (grey)
Prepared by :-
AHMAD SAFWAN BIN ABD SAMAD
leonlyguyz23@blogspot.com


No comments:
Post a Comment
Note: only a member of this blog may post a comment.